miércoles, 29 de febrero de 2012

Gluing the bass bar


So here we are working the sould of the little thing. The bass bar is the only stick glued to the inside of the instrument. I threw the piece of spruce that came with the kit directly into the fire oven and found a decent piece of quatersawn spruce that I had. So here we go. Tomorrow I´ll close the box. The top and the sides are already prepared for assembly. You can see that I´ve made a thin layer of hide glue at the edge. More about that tomorrow.
In the back, the little round things glued to the kork is going to be the spool clamps that I´ll use for clamping the box together. Y

martes, 28 de febrero de 2012

graduating the back plate of the fiddle


The back was also to thin. Some places 1,9mm where I would have liked it to be 2,5mm. Whatcan I do? Go ahead and graduate and try to compensate the best I can. Anyways, most of the back was way thick, so it can only get better.
I have already decided that this is not a way to build a Violin/fiddle. As a professional I cant accept that the basic and most impostant part of the instrument is wrong right from the start. Its going to be a violin and its going to sing beautifully. Here I trust my capacities as an instrument maker, but at the same time it has made me take the decission that I have to make a violin from scratch. So I have ordered wood and more about that later.
So back to scraping. Lots of scraping. Fortunately I know how to set up a scraper and maple is such a joy for a scraper freak like me. I listened to the Chieftains 4 and to Kevin Burke "if the cap fits" and lilted a few tunes while I scraped along. There´s no better way for me to forget the outside world. Oh yeah, there´s one more thing. Planking a clinker hull of a boat is being totally out of time and space and the dane becomes a viking and my house becomes Valhalla.

domingo, 26 de febrero de 2012

graduating the front plate of the fiddle

So here is where I am in real world time. I´ve just finished the graduation of the top. Here the problem was that some parts were to thin, so I can only try to make it as close as possible to the desired thickness and hopefully it´ll be "good enough"
The top I´´ve put upside down on the back and sides and with the small thumb planes and a scraper, I´m taking the plates down to the desired thickness, taking care that it´ll be thin enough all the way out towards the edge. On the photo you can see a Hacklinger guide which i use for checking the thickness while I work.
I can feel that this will be a fast build. I want to play......

sábado, 25 de febrero de 2012

Fluting the edges of the plates on the fiddle

I actually started building the fiddle some days ago, but wanted to finish the guitars before posting. After having inlayed the purfling I started to work the outside edges of the plates. There are two reasons for that. It looks good and it makes the transformation of the thickness from 4mm at the edges to 2,5 just inside the edges a lot smoother, giving a more open sound. (Thats what they say) If you make a drawing, its obvious.

Guitars 94 and 95 ready for FP.


Ok, here they are. Numbers 94 and 95. Ready for French polish. Hopefully they´ll have strings on in 3 weeks time (more or less)

jueves, 23 de febrero de 2012

more scraping and doggy is sleeping

Here I´m working on number 94. Both guitars are now almost finished and these are just some small touches. Again, scraping is relaxing. Doggy like it as well.

martes, 21 de febrero de 2012

What to expect from a Stewmac fiddle kit

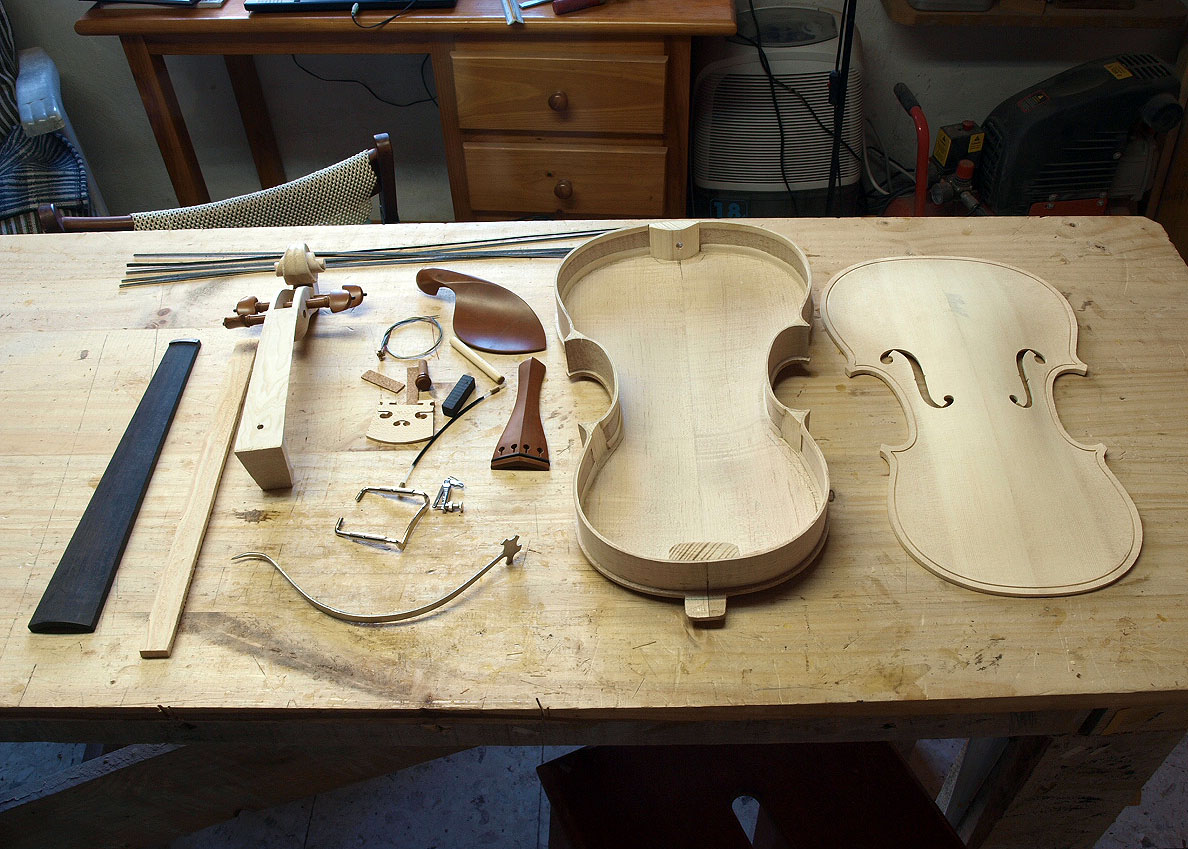
As I wrote a few days ago, the kit that I received from Stewmac.com wasnt what I had expected. Here´s what I got.
Some decent woods, 2nd or 3rd quality. Some flaming in the maple, a big black spot on the soundboard that can be seen on both sides and also a bit of runout on the lower bout. But in general wood that will sound. No problem there, and I didnt expect anything better.
And now to the not so good part. Both the top and the back was warped. Just some 3 - 4 mm each one, but not good at all. Besides, the sides were not square to the back. and in total, the top didnt fit very well to the back and sides part. There werent any "overhang" left. A violin/fiddle shoul have its top and back plates "overhanging the sides with 3mm.....
Worse even. The plate graduation was very uneven. This I expected.. But I didnt expect the plates to be TO THIN. Some spots 1,9mm is to thin and it makes graduation an enormous compromise or to say, impossible. Bad, just as well is the inner linings.. Look at the photo. VERY poor workmanship. And even worse, very thin. the total thickness of the sides and linings were under 2mm on some spots.
Besides that.. well, a flatsawn neck... and the rest ok..
Is this ok.. No... I contacted Stewmac and they promptly accepted to replace the kit. BUT I refused, because I wasnt in the mood for struggling with Spanish costum one more time. This kit took me 3 weeks to get through (and a lot of money) Besides, why another kit. The workmanship is so poor that I couldnt expect anything better and Stewmac has shown me that final control from their side is nonexistant, so I decided to stay with this (darn) kit.
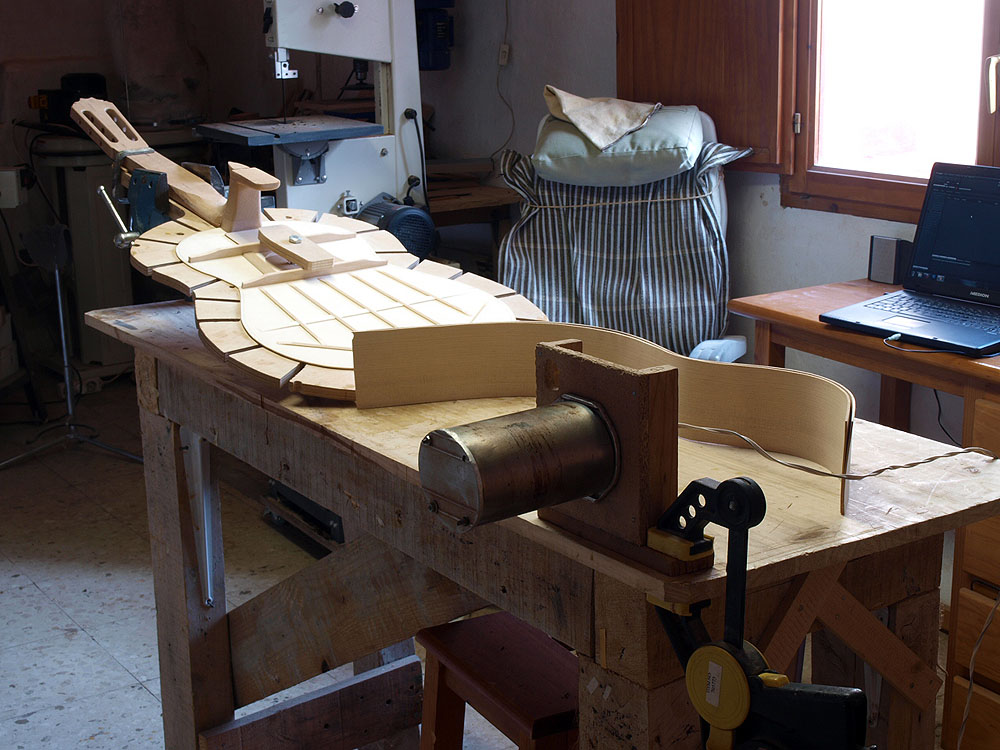
After some days in my humidity controlled workshop, the top straightened out. And the back and sides, I left on a humid concrete floor for some days and then it became almost acceptable...
So here we go, building will start. It´ll be a fast one. I dont have to much respect for this kit and I want to play...
A lesson has been learnt. I´ll continue buy my little things from Stewmac, but they´ve taught me that they are no better than mr. whatever seller on Ebay

domingo, 19 de febrero de 2012

Scraping the bindings

Scrapers are woodworkers best friends. They are cheap, highly effective, its very difficult to damage thigs with them, they dont create dust but tiny wood shavings and they are just cool and relaxing to set up and use. You can listen to music while scraping. Scrapers are my favorite tool. But you have to learn how to set them up...
When scraping the bindings, I like using the gooseneck scraper. It only scrapes in a small area, meaning you dont take away wood from the plates. Later on i finish with a very thin square scraper.

A Stewmac fiddle kit


I saw it comming and I know how I am... This summer, after more than 15 years without playing a violin, I tried my fathers violin for just 15 minuts and I liked it. I thought I would be a lot worse but it felt good.
I was good at playing the violin. I played folk music, Classical music and a higly electrified noise avantgarde violin. I played Vivaldi, Bach, Haydn and Mozart violin concerts and I played in the youth simphonic orchestra of Copenhagen. But I left it. The vioin is a demanding bastard and I got tired of it and my ambitions didnt help at all.
So here we are. This is what I´m going to do while I French Polish guitars number 94 and 95. Build a kit fiddle. The kit is horrible. Realy low quality Chinese crap. More about that later. I´m going to build it fast because somehow I dont feel good about having bought this crappy kit and at the same time I want to play...... Lets see what happens.

jueves, 16 de febrero de 2012

Soundport on number 95 finished.


So here´s the finished inlayed soundport. On the bottom you can see the inside patch that holds everything together. The most complicated part of this whole story is that the surface is not flat but curved.

martes, 14 de febrero de 2012

Inlayed soundport making


On the top picture you can see the hole that I´ve cut for the inlayed soundport. Below you see the inlay being gluid into the sides

sábado, 11 de febrero de 2012

Classical bracing system


Here you have guitar number 94. A cedartop classical with my version of a Hernandez & Aguado bracing system.
There´s one little diference and its that I build with a bridge strap below the bridge instead of the bridge patch that the two Madrid makers use.
All my guitars are built with a strap. I like the sound and it helps me control the dome of the soundboard. I brace flat, and the strap makes the soundboard lift the around 2mm that I think is optimal. Besides, my experience is that the strap makes the high register of the guitar sound stronger.

domingo, 5 de febrero de 2012

Here you have number 95 ready to have the sides installed. The cypress has been bent in the bending machine, but as you see on the photo, there´s a lot of springback in the sides (cypress is stubborn and doesnt want to be bent). Thats normal for cypress and it doesnt happen to rosewoods. Therefor, I do a final bending of the sides on the hot tube you see on the table right before I install the sides.

viernes, 3 de febrero de 2012

assembly begins


The first thing I do when assembling the different components is to glue the neck and the soundboard together. There are other ways but this is the way I learnt it. The clear plastic has a line in the middle that I put on top of the centerline of the neck and the soundboard so that I can assure that everything is straight.
In the back, you can see my homemade sidebender "cooking"